
Measuring for Your Stained Glass
Measure Twice!
"Measure twice, cut once," is the trusty old adage and by heck is it worth taking that on board. If you are ordering without us having eyes on the opening and rebate that your stained glass panel will be fitting into, it's imperative that your dimensions are taken well and correct when installing. Now, we do offer you the option to have a thicker border lead at the time of order. This means the panel will arrive slightly bigger than it should be, i.e., the exact size of your opening. Obviously, if your panel is the exact size of your opening, it won't fit so will need to be slightly smaller. We can give you a thicker border lead for you to trim down and fit nice and tightly, but we wouldn't recommend it. The best case is that you take your 'daylight' or tight dimension and then knock off a little to give you a 'glazing size.' This may sound complicated to some of you but it really is very simple. After 40 years of measuring for glass, I can tell you, the most common issue even qualified tradesmen have is not the process of measuring, but numerical mistakes. Trust me, I've made many. Transferring data is also a major area of concern, along with the very well-known, 100mm Bermuda Triangle.
Anyway, please follow our simple steps below and should you have any questions, or even want us to walk you through the whole process via Facetime, we will certainly help. Please note, we do not work in inches. Metric is our weapon of choice and we will not transfer dimensions from imperial to metric for the safety of both parties and in order for you to have a seamless experience.
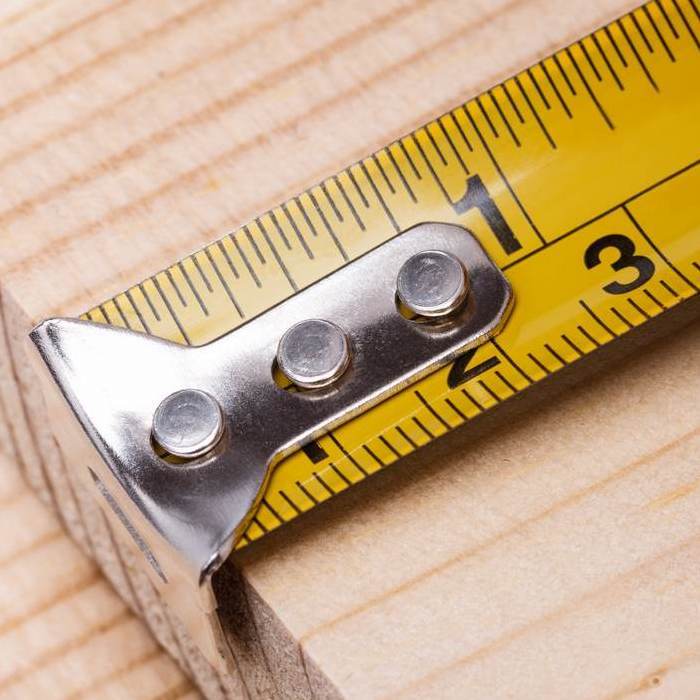
1. USE A GOOD QUALITY TAPE MEASURE
It really does go without saying but please, do not use your Grandma's ragged old cloth tailor's tape. You would likely have better results just by guessing. Now, you don't need to have your tape measure calibrated to within an inch of its life but a reasonably new construction-style tape will work wonders. We actually recommend a steel rule wherever you can however, on larger sizes, that's not always possible. A general construction tape will be just fine.
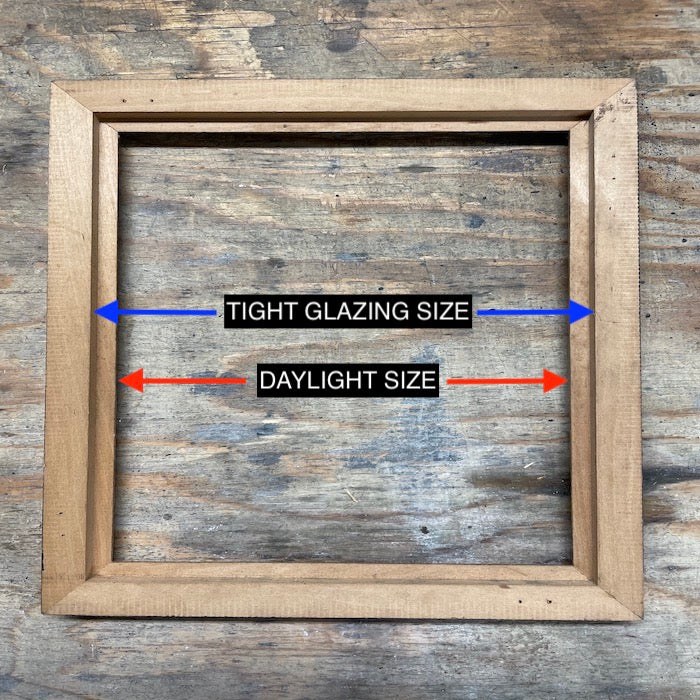
2. UNDERSTAND YOUR FRAMES DIMENSIONS
We require your panels 'finished glazing size' at the time of order. Don't worry, we can help you at the time of measuring but, if taking this measurement yourself, you will need to understand the 2 key dimensions. See the image for a simple overview. Your glass needs to fit snugly into the frame thus, your finished glazing size will be your 'tight glazing size,' less a moderate amount enabling your to fit your panel with ease.
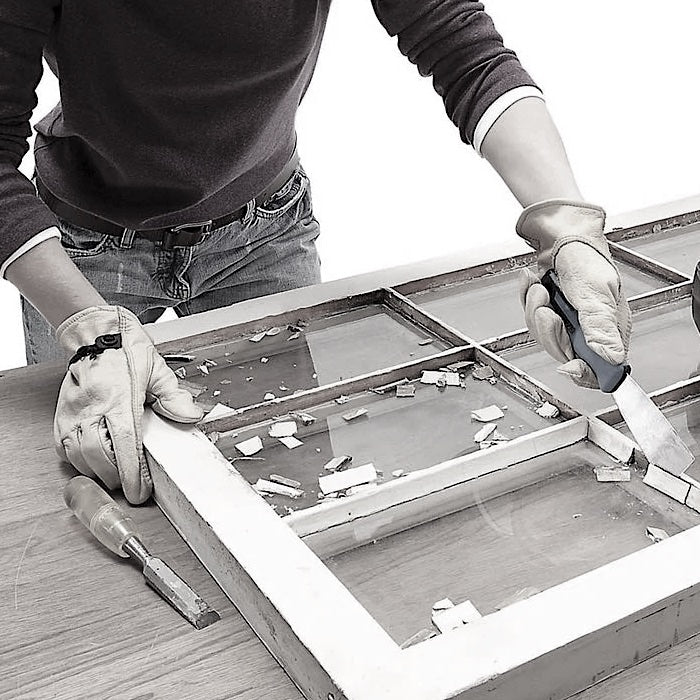
3. ENSURE YOUR OPENING IS CLEAN FOR MEASURING & GLAZING
Enabling you to take precise measurements, your opening must be clean and clear, if not a new opening, of any bedding compound like putty or timber quadrant beading. Your measurements will depend upon your visual accuracy and eventually, your installation will require a nice smooth rebate to bed in to.
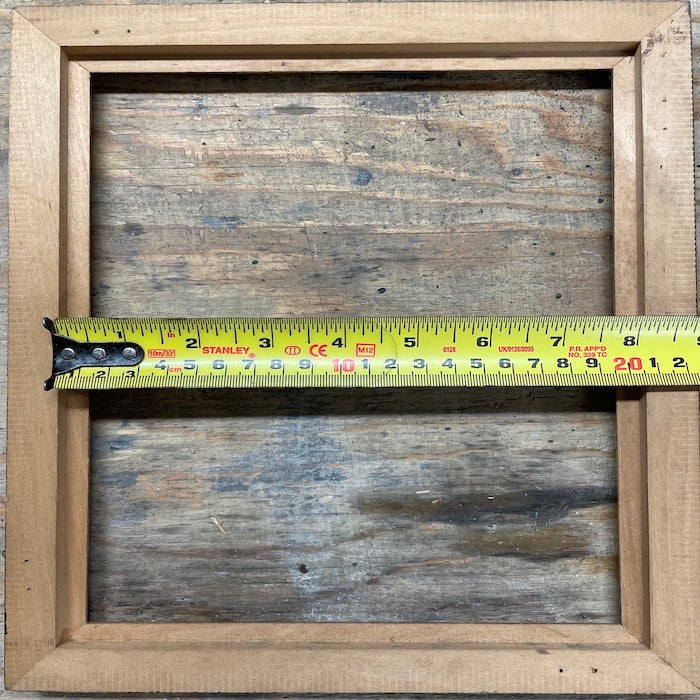
4. MEASURE THE TIGHT GLASS SIZE WIDTH. ALWAYS WIDTH FIRST.
Now you have a sparklingly clean opening, you can go ahead and take your frame's dimensions. The way we take these dimensions applies to 99% of the frames accepting stained glass, with ecclesiastical work being the oddity. ALWAYS measure and present to your artist the WIDTH first. This is the industry standard the globe over. As you see from the image here, the 'tight glass size,' is 205mm.
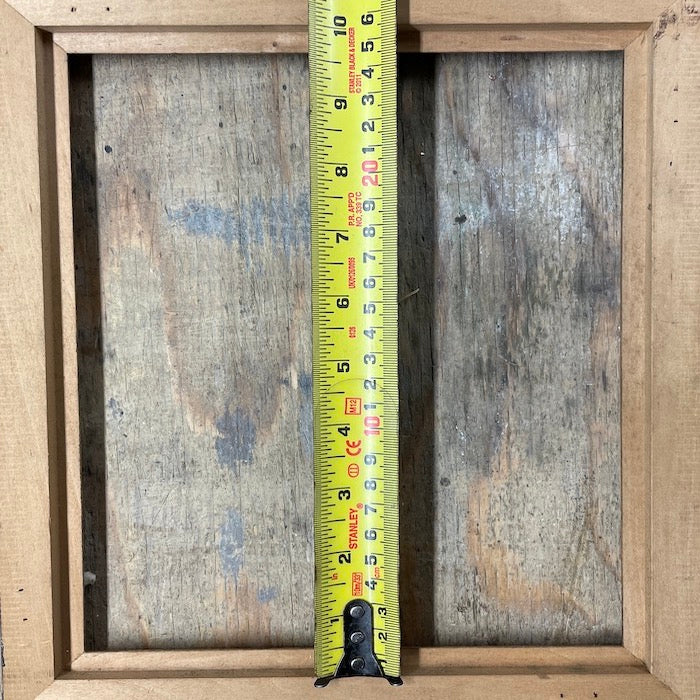
5. NOW MEASURE THE HEIGHT OF YOUR TIGHT GLASS SIZE.
Repeat the step above for your height. Note again, your height should be measured and presented as the second dimension. Thus, you can see that the 'tight glass size' is 255mm. Your 'tight glazing size' measurement would then look like this, 205mm (Width) x 255mm. (Height) - 205mm x 255mm.
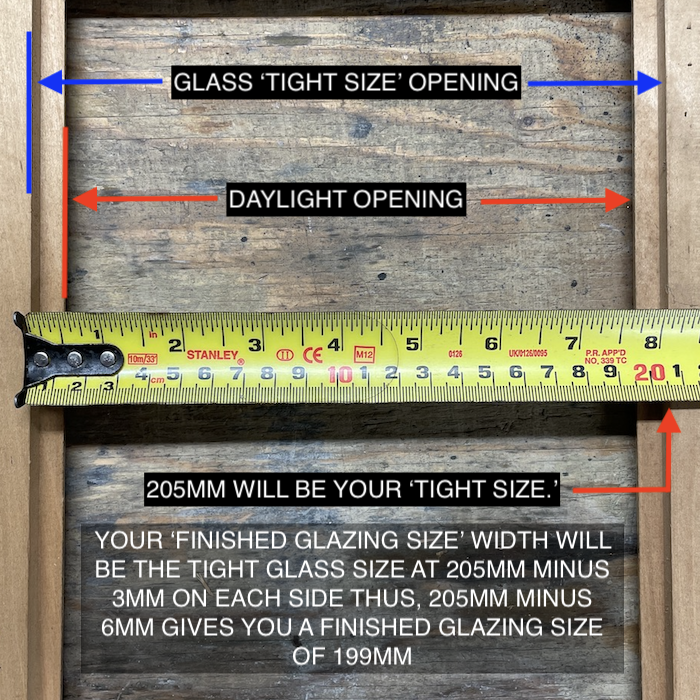
6. MAKE YOUR DIMENSIONAL ADJUSTMENTS TO THE TIGHT GLASS SIZE TAKEN
Now that you have your tight glass size, it's very easy to make your allowances for glazing or your 'finished glazing size.' As above, if your tight glass size is 205mm x 255mm, you will then need to knock off 6mm on each of the dimensions. This allows 3mm around the whole panel for ease of glazing. Thus, when you come to glaze the panel into your opening, it will sit nice and snugly. You will then bead the opening up and you are done.

6. REPEAT STEPS 4, 5 & 6 AGAIN.
As we noted at the beginning of this little help page, measure, measure, then measure again. Measure twice, cut once! The more effort you put into this, the more certain you are of a perfectly executed installation. There are of course other elements that may affect your installation such as the squareness of the frame you are installing your panel into, however, we always oversize our border lead allowing you to trim a little off the edge. You can trim this carefully with a standard craft blade or a Stanley-type. If you run into issues, we're just a call away. knife.
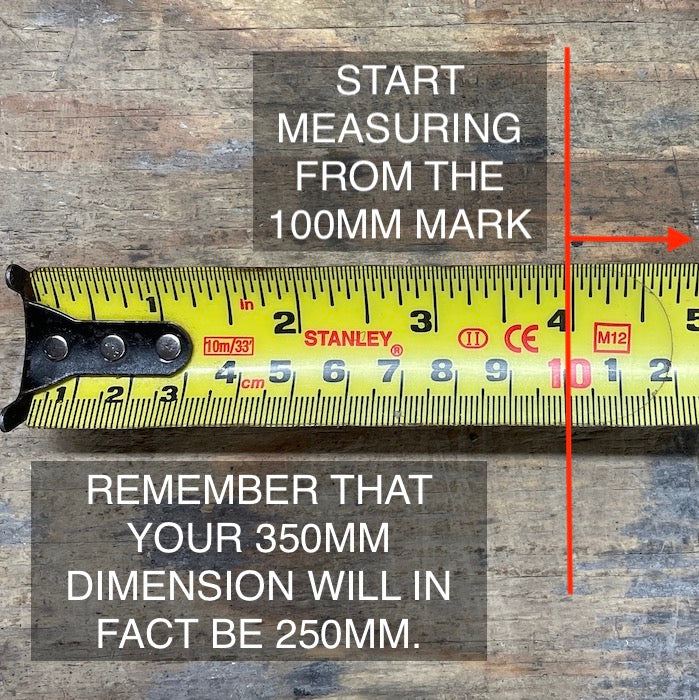
PRO-TIP - MEASURE FROM THE 100MM MARK.
A little pro-tip. Given the movement at the nib end of all construction measuring tapes, we always measure from the 100mm mark as this doesn't move and gives perfect results. Just remember that your reading of 350mm is actually 250mm. Again, call us if you have problems.
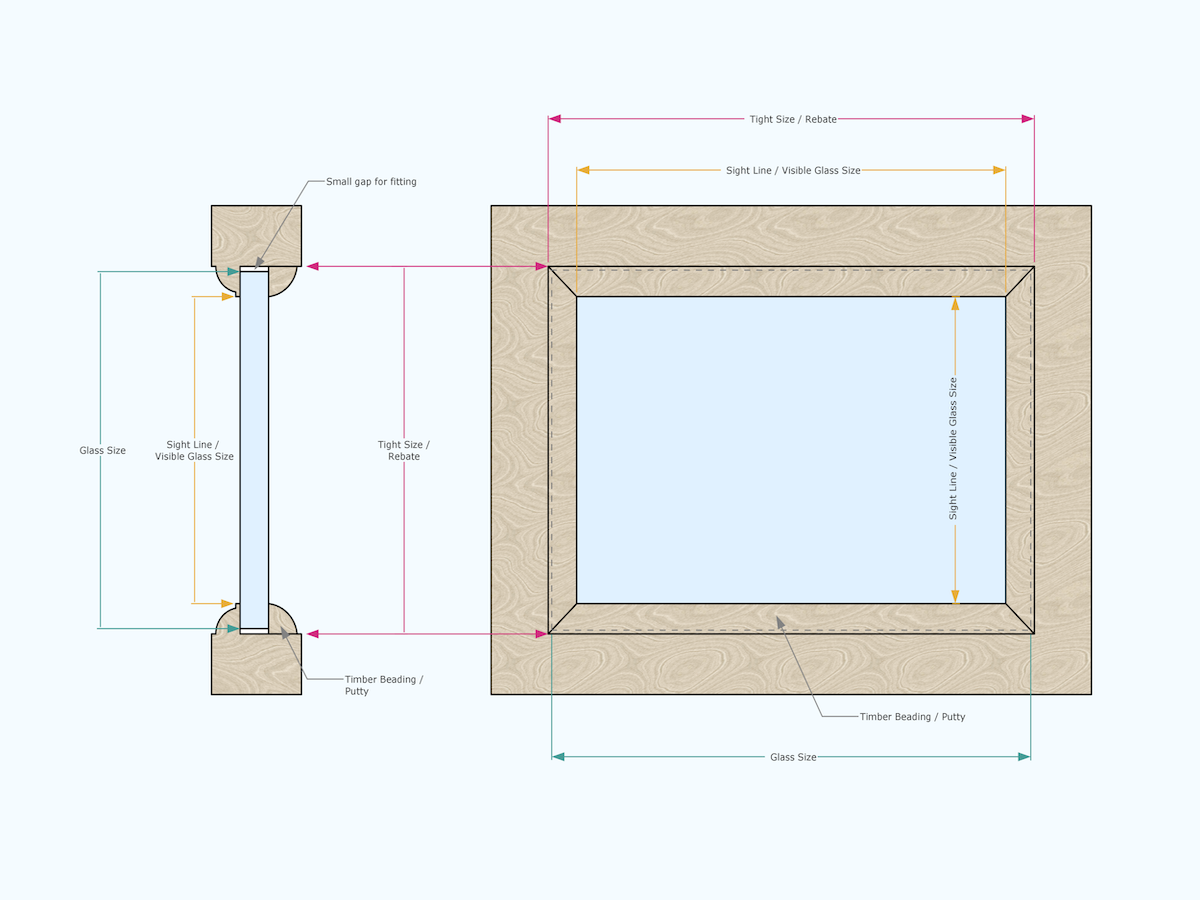
SEE THE DRAWING BELOW FOR A BRIEF OVERVIEW OF THE ABOVE
Contact Us
Share your thoughts, ask questions and/or simply talk shop and let us know your story.